


My quilt guild recently featured quilter Rita Hutchens and her 'Totally Tubular' style of quilting. But before we listened to her speak and saw all of her amazing quilts, we had a special charity quilting day where we used the simplest of techniques to tubularly cut and piece a baby quilt using a simple 'streak of lightning' pattern, that was cut and sewn in a tubular way.
Being spatially dyslexic, I wasn't sure I'd follow the instructions but after half a dozen other quilters beat me to each new step and goofed, I learned from their mistakes and it was only at the very end that I questioned myself and had an onslaught of helper rush over to aid and abet my quilting.
It ended up being so much fun, that I went on to make a second one at home, this time, remembering the tricks that worked correctly and with no problems at all! There they are, my simple two above, already finished and donated to good causes!
For those of you not familiar with tubular piecing or with Rita Hutchens, I thought I would share a bit about her and her designs, first.
Rita Hutchens has been creating her tubular style of quilt design since about 1980. She is the author of Totally Tubular Quilts, which outlines her strip piecing methods. Basically, Rita's method involves creating strip sets which are sewn into tubes, then cross-cut to create long rows of either squares or triangles of any size or angle. Take a look at some of her creations, they are amazing!


Diamond Tubello, 14 x 22"

Mirror Image Study, 17 x 24"

Ziggity Doo Dah, 37 x 49"

For more information, also see Rita Hutchens' videos at YouTube.
A Quick and Easy Tutorial for easy 'Streak of Lightning" quilts, done with tube piecing technique:
A Quick and Easy Tutorial for easy 'Streak of Lightning" quilts, done with tube piecing technique:
While my own 'Streak of Lightning" pattern (shown in this post) is very simple, it is still related to Rita's own tubular piecing technique and unlike most other Bargello methods, there is no waste with this method.
It was easier than I thought it would be, and really went quickly once I figured out the patterning and snipping!
Streak of Lightning Photo Tutorial
by Michele Bilyeu
www.with-heart-and-hands.com
Needed to make a 42" quilt:
Quilt Top:
Eight 4 1/2" strips-2 each of 4 different fabrics
Four 1 1/2" strips...inner border
Four 4 1/2"strips..outer border
Backing Fabric: 47" x 47"
Instructions:
Cut the strips for top as described above! Then......

1. Arrange strips in order of your fabric choices....1 to 4, then repeat. 1234..... then 1234..... for a total of eight strips.

2. Sew strips, in order, together from selvedge to selvedge. Then trim top edge, as shown below.

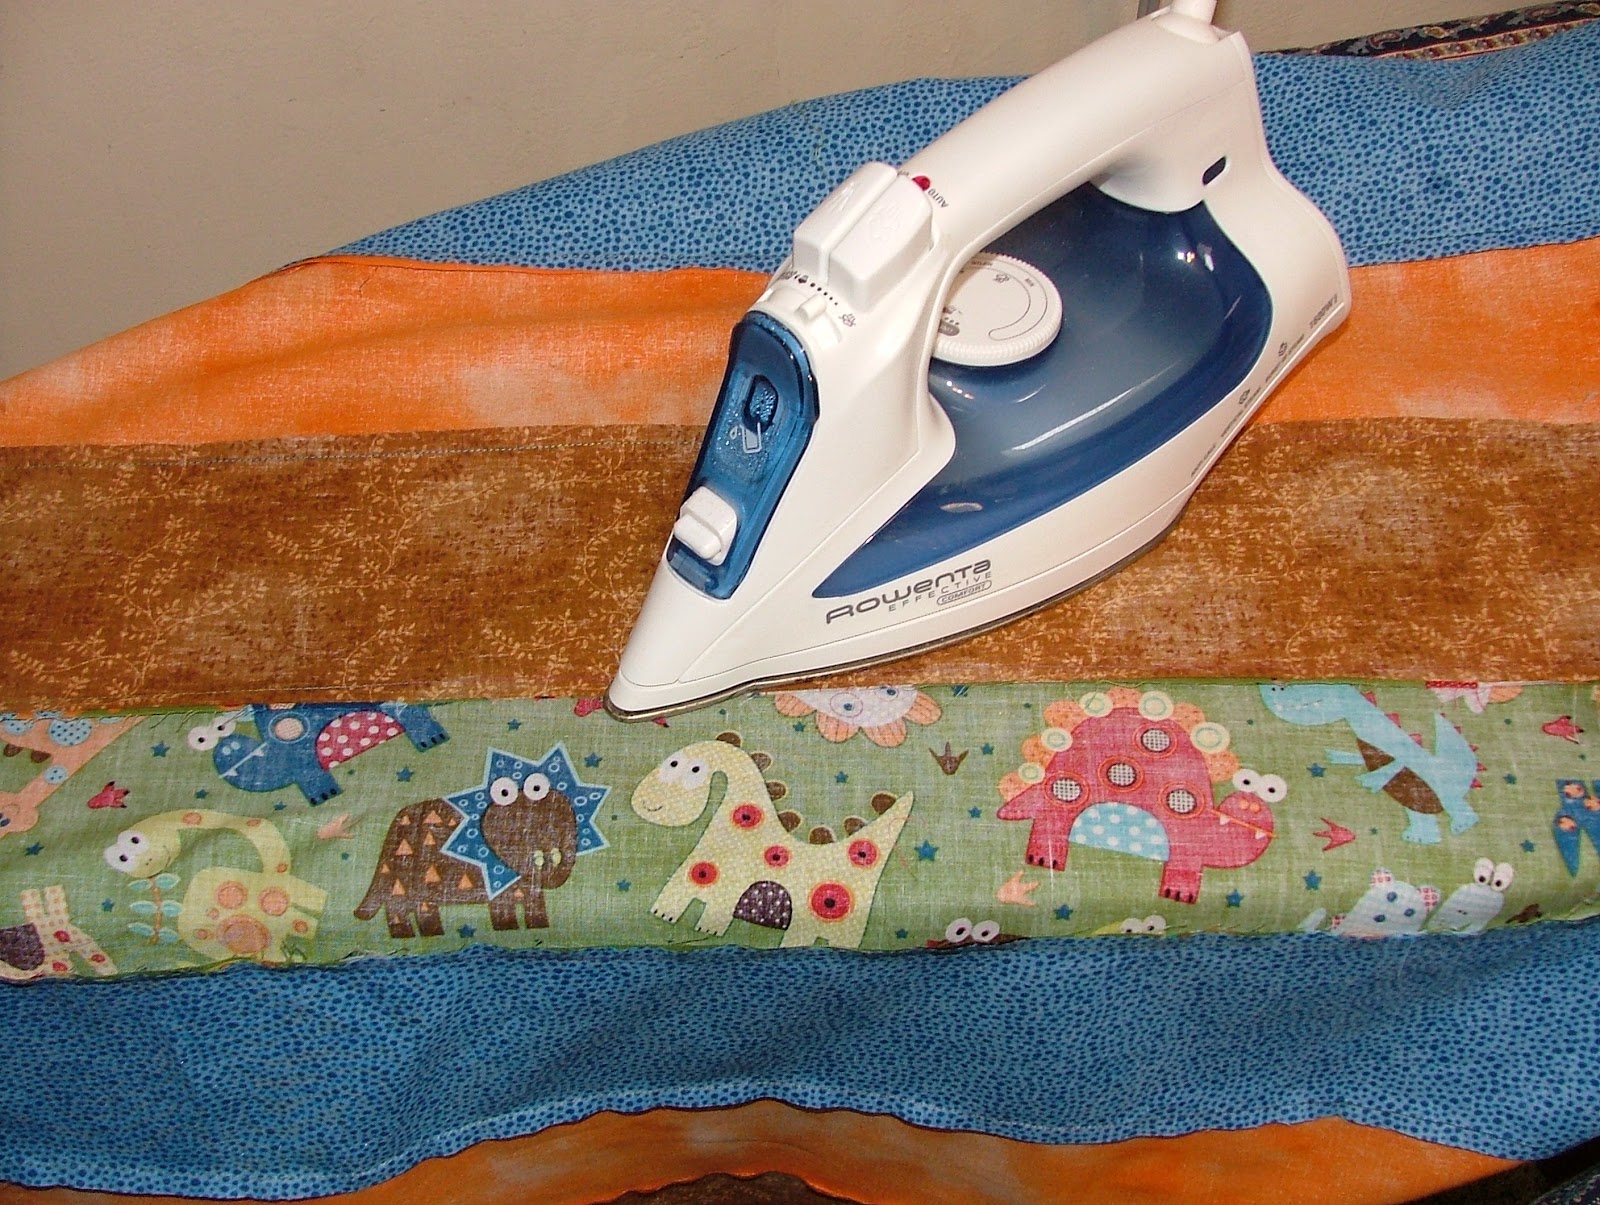
3. Press first seam up, then down and so on, alternating seam pressing direction. I'm showing the top pressing, in the photo, of course! I'm showing the top, here, but do the other' seam' side, first of course!

3. Sew top edge of pieced strips to bottom edge of pieced strips, creating a tube.

4. Lay tube out, carefully lining up all of your seams. You must be sure it is straight, as you will be cutting through multiple seam layers.

5. Cut eight 4 1/2" strips. These will be actually creating your blocks!

6. Now..believe it or not, use a seam ripper (we actually used a new pair of batter powered 'trimmers' or 'groomer's but.... affectionately known as 'nose hair clippers, to zip through our seams in record time!

7. Moving down the rows, remove the seam between block 1 and block 2 on the second strip. Then remove the seam between block 2 and 3 on the next set..and so on.
You are simply using the streak of lightning diagonal pattern to remove the little seams to create your larger pattern!
8. You should now have 8 strip sets, each 8 blocks long.
If laid out correctly, in order of the fabrics, it will make a diagonal design. Check the patterning, row by row, as above.
Any irregularity is because you goofed in your previous cutting. Check the diagonal pattern, and clip and reposition to correct yourself if you goofed ;)
9. Press again and finish your quilt, as usual!
To finish your quilt:


Add strips for inner border,
(measurements suggested above in list of strips)
Add strips for outer border
(measurements suggested above in list of strips)
Once you figure out just how truly easy this technique is, you can create multiple little 'Streak of Lightning' quilts using this tubular method, very quickly and efficiently!
Have fun!
Michele Bilyeu blogs With Heart and Hands as she shares a quilting journey through her life in Salem, Oregon and Douglas, Alaska and all of her AAQI Quilting. Sharing thousands of links to Free Quilt and Quilt Block Patterns and encouraging others to join in the Liberated Quilting Challenge and make or donate small art quilts to the Alzheimer's Art Quilt Initiative (AAQI) Help us change the world, one little quilt at a time!
4 comments:
Thanks for the tutorial, Michelle! That's a great, quick way to make a quilt for Project Linus. And thanks for the alert to Totally Tubular. I hadn't heard of that, but it looks wonderful.
This is so cool. Love her own quilts. Does she have a book?
Yep, you're right, her quilts are stunning! I didn't read right through the tutorial but I will -- when I have time to try my first Totally Tubular quilt! Yours may be simple but they are very effective and will be appreciated by their recipients!
Happy Thanksgiving to you and thanks for your great blog.
Post a Comment