

Every year in Salem, there are organizations that encourage expectant mothers to take the best care that they possibly can of themselves, and of their expected babies. Often, those programs support moms who lack the emotional, family, or financial support that encourages healthy eating for themselves, much less for the new little ones.
They often request things like baby quilts, burping pads, baby bibs, or simple little sleepers and other clothing for the little ones. (Free Babies and Childrens Quilt Patterns)
I had the opportunity to be with several nursing mothers in a one week interval while I was up in Alaska in September, and noticed that both of the modern, young moms used baby nursing cover-ups which are also called nursing aprons. And because both of these young mothers were on their second children, the coverups had already seen a lot of use and wear!
Bingo! New gift idea! Make a Baby Nursing Cover-up/ Nursing Apron! In my day, all we had were receiving blankets for comfort and privacy and they didn't stay put. A nursing apron is only a tad bit different than a regular apron. You still have a neck strap, you still have an apron body but the body shape doesn't narrow into a bib at the top, it simply stays wide. So, it's basically a horizontal oblong with an attached strap.
I found a series of free tutorials or patterns, online....but to be honest, I didn't especially like their design and having witnessed these young mothers packing their cover-ups for trips, between houses, in their purses, etc. I knew that there was one crucial design element missing. Ease of transport and pack-ability. I had already designed and created a great many fabric shopping bags that turned into their own little carry pockets. And I have made a number of quillows where quilts pocket pouch into little pillows.
So, I had my 'aha' moment and thought..."Brilliant!!!" a nursing cover-up, pocket pouched that turns into a neat and tidy little flat unit that can easily carried or slipped into a purse or a diaper bag.


Step 1: Select your fabrics.
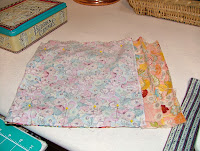
I went into my stash and found bright and busy fabric that would not only be cheerful, but coverup stains of any kind and checked the web for patterning ideas. As you can see from the photo above. One fabric piece for the top, and another for the lining. The pocket ends up on either side, but if you didn't mind the bulk, you could actually sew a pocket on each side and make it fully reversible.
(I am making two aprons at once, with these choices of fabric. So, the fabrics may switch around as I remember to take photos, or change up my design plans!)
I debated over some of the ideas of making a separated pocket for holding a diaper etc. but realized that with my design, I didn't need to add that. It simply automatically created a pocket space for either /both a flat pocket of wipes and a diaper. So, on one side of the cover-up or both...your choice!(I show with one pocket on the outside only.)
I didn't use velcro etc because the tabbing on one would not match the tabbing on the other (i.e. pocket holding items versus pocket pouch for transport) and I didn't want the moms to deal with their long hair snagging on velcro tabs. Remember? I'm the one with 36" hair that had two mishaps with appliances and hair loss ;-) Much less sweet babies having hair and velcro issues!
And I do not like the insertion of boning that some 'sewists' (new term for a sew-er) use in the top seam, as from many years of experience you don't need that window to see down at your baby, the natural contours of our bodies creates that anyway and it only takes one hand to peek at baby, anyway!. And boning would not be conductive to pocket pouching the coverup anyway.

Step 2: Cutting pattern pieces.
(note: I made two nursing aprons at once, and experimented with color choices so photo tutorial may show either color choices for Apron #1 or Apron #2 at any given time.) This shows one apron with its choices laid out after selecting and cutting to size:Apron Sections:
Cut two as shown for apron, and lining.
Small: 28" wide by about 34" long
Medium: 34" wide by about 35" long
Large: 36"+ wide by about 36" long
Pocket Sections:
Cut 2 pocket. sections. You are making a lined pocket that is then sewn down.
I cut mine 10"-11" wide by 12" in length.
(Pocket Band is optional, mine doesn't show well in this photo, but it did add a nice decorative element. You would cut this by the width of the pocket (10"-11" across by 4"-5" deep.)
Apron strap:
One long one that is created and top stitched and then cut into the strap and a short looping piece for tying the strap onto for sizing of length. I cut my pieces 30" long by 4"-5" wide.
Step 3: Sewing apron cover-up
Optional Seam Finishes:

Sew apron body (front and back main pieces) right sides to together.


Turn apron to right sides out.


Press apron body section creating a nice folded under finish on your still open seam at the top.


Now measure and cut off a section of the top stitched strap to use as your loop. I cut mine about 5"-6" long. 5 for the small sized apron, 6 for the medium sized apron.

(Switching apron color choice views here...multi-tasking projects doesn't always mean all photos of all projects end up being good photos!)
Attach the strap and the loop section of the strap to the coverup body piece. You are inserting the straps from the inside and allowing the raw edges of the strap to match the raw edges of the apron top to match up...just like inserting a purse strap.
Being right handed, and the average mother being right handed, I attached the strap to the right side (looking down at self) and the smaller loop, to the left (looking down at self. Imagine using your own right hand to adjust, or left hand for a left handed mother ;-)
Pattern sizing note:
Measurement for positioning of the strap attachment can be altered to best fit the mother.
I made one 'small' apron and one 'medium' one as I did this tutorial. The 'small' apron was for a mother who was only 4'10" or less and didn't need a long apron dangling down her legs as she sat! The width of the body, the size of the chest, the sitting height of the mother and even the size of the baby can make a difference in comfort as well as looks, just like any garment's sizing matters. Mine measured out to be approximately 10"-12" apart from each other, measuring from the center of each strap, to the center of the apron body.


Step 4: Making and attaching strap section and loop:
Make strap pieces:
Cut full 12" long by 5" wide strap piece, as shown in first diagram of pattern pieces.
Fold in raw edges on each side to meet in the center..they are too narrow to easily use the tube and inside out technique. So, much easier to just fold in raw edges, and top stitch into a strap shape!

Topstitch/sewing of the strap can be either down one long side or down both.

Now measure and cut off a section of the top stitched strap to use as your loop. I cut mine about 5"-6" long. 5 for the small sized apron, 6 for the medium sized apron.

(Switching apron color choice views here...multi-tasking projects doesn't always mean all photos of all projects end up being good photos!)
Attach the strap and the loop section of the strap to the coverup body piece. You are inserting the straps from the inside and allowing the raw edges of the strap to match the raw edges of the apron top to match up...just like inserting a purse strap.
Being right handed, and the average mother being right handed, I attached the strap to the right side (looking down at self) and the smaller loop, to the left (looking down at self. Imagine using your own right hand to adjust, or left hand for a left handed mother ;-)
Pattern sizing note:
Measurement for positioning of the strap attachment can be altered to best fit the mother.
I made one 'small' apron and one 'medium' one as I did this tutorial. The 'small' apron was for a mother who was only 4'10" or less and didn't need a long apron dangling down her legs as she sat! The width of the body, the size of the chest, the sitting height of the mother and even the size of the baby can make a difference in comfort as well as looks, just like any garment's sizing matters. Mine measured out to be approximately 10"-12" apart from each other, measuring from the center of each strap, to the center of the apron body.

Step 5. Making and attaching pocket:

Optional Pocket Band:
photo tutorial shown below, using another color choice, again from the second apron, again!
The optional decorative pocket band, at top shown in a simple photo tutorial. Skip the photos shown below if this is not wanted or too confusing for you..

photo tutorial shown below, using another color choice, again from the second apron, again!
The optional decorative pocket band, at top shown in a simple photo tutorial. Skip the photos shown below if this is not wanted or too confusing for you..

Stitch band to pocket, right sides together and follow steps as shown, leave inside seam of band to pocket open.


Without optional pocket band:
Stitch two pocket sections (outside and inside lining) right sides together, leaving a small area open for turning. It is easiest to leave the bottom open for most sewists, for the turning right side out. Just use the photos as shown above but ignore the band!
Turn pocket, right side out, so it looks like the photo, above.
Press.
(With band insert, only: Pin inside seam opening closed. Hand sew opening in band. )
Pin pocket onto nursing coverup-apron, lining up bottom edges together.

Sew pocket onto apron body.
I sewed through both the front and back (lining) pieces so as to make it sturdier for all of the pouching use.
Note:
I back stitch at upper corners to lock stitch and go about three stitches in towards the center as I do this.
Your Nursing Apron/Cover-up is finished, now to learn how to fold it into its own little pocket pouch!
6. Nursing Cover-up, Pocket Pouched!
"How to Fold the Nursing Apron into a Pocket Pouch"


Fold in each of the two sides.

Fold again, top to bottom.

Reach into the center section (inside of the pocket in other words) and pull the apron out.
This will include that strap which gets pulled into the very inside where you wll not see it at all in the pocket!
You should be viewing your pretty lining fabric, as well as your pretty front fabric, as you pull, see photos above. If you reach into the wrong space, you'll know it as soon as you pull it out. Then try again, using logic as to what should be visible on both sides of the pouch when it is all out!

The nursing cover-up/apron is now a pocket pouch and you now get to view your lovely lining fabric, as the outside now, instead!
Isn't it cute? Ready to tuck into a purse or diaper bag, or a backpack. And some mothers just use it as a travel cover-up completely over baby in his or her little front carry sack on airplanes. '
Total discretion and it keeps light out of baby's eyes whether she/he is nursing or sleeping!
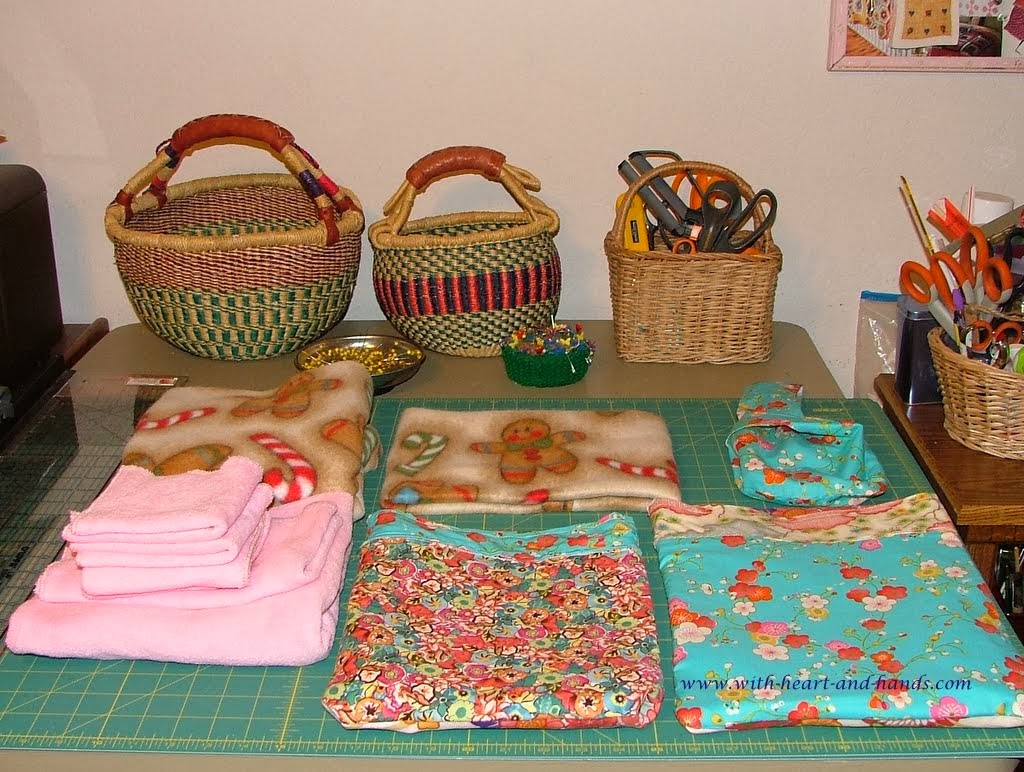
And I also made an assortment of baby towels, wash cloths, burp bibs etc. for little ones. I started with these little pink ones on the left, but then also made a variety of other colors!
And do check out my free quilt patterns for little ones at:
Free Babies, Childrens Quilt Patterns
Free Baby Bib Pattern with Paper Piecing CenterBaby Breakfast Bib Tutorial
Baby Burp Cloth Tutorial by Finn, Pieces from My Scrapbag
How To Make A Burp Cloth Tutorial
Overhead Baby Bib
Baby Sling Tie Baby Bib
Moda Bake Shop: Baby Burp Cloth and Bib Tutorial
Button Shirt to Toddler Dress
Chenille back blanket
Dog Applique Onesie
Felt Baby Shoes
Itty bitty Baby Dress
Diaper Changing Pad
Soft Baby Blocks
Ruby Soft Doll
Nursing Cover
Another Nursing Cover
Childs Pool Robe
Bitty Booties
Cloth Baby Shoes
Fabric Bird
Fab Fifties Bib
Childrens Apron
Baby pants from recycled sweater
Michele Bilyeu blogs With Heart and Hands as she shares a quilting journey through her life in Salem, Oregon and Douglas, Alaska. Sewing, quilting, and wildcrafting, with small format art quilts, prayer flags, and comfort quilts for a variety of charitable programs. And best of all, sharing thousands of links to Free Quilt and Quilt Block Patterns and encouraging others to join her and make and donate quilts to charitable causes. Help us change the world, one little quilt at a time!
1 comment:
I enjoyed reading your tutorial! I've also created a nursing apron with a pocket that it folds into, and was interested to see how you solved the design challenge. Wishing you health and blessings! Marsha
Post a Comment