


In my crazy Quillow making days last week, I also made this cute little carry bag with lots of pockets and a really, super easy ID tag to go along with it!
The way that I make bags and the tag are so much easier than how most people make them that I thought I'd shown them off, as well. And while sewing 4 gifts in under 3 days didn't allow for remembering to take too many photos..you'll figure it out from the ones I did take and my instructions or look here for the simple technique I use most often:
Basic Bag Directions from morsbags.com(PDF) or Basic Bag Directions (MS Word)
Previous morsbag post and instructional photos

I wanted the bag to be large enough to hold the newly created quillow, while in its pillow form and still have room for a gift card and whatever else the graduating great-niece might want to put in it for after her barbeque graduation party. Everything worked out perfectly. The bag was my standard 'morsbags' sizing.
This one was cut at 18" x 20" and used in a vertical placement with handles cut at 4" wide and 22" long. It takes two handles with placement in a loop shaped on each side of the bag center spaced 5 1/4" from each outside side of the bag. I lined it by cutting doubles of bag fabric and added my own pockets...one on the front of a quilt square block and two on the insides, one on each side. Peeking inside, you see:

Turning it inside out to see the lining and pockets looks like this..each side of the lining inside:


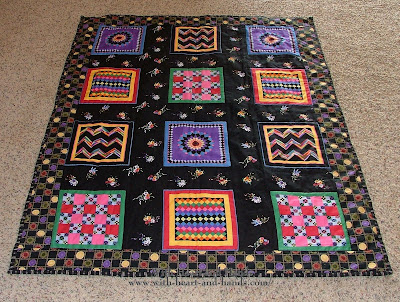
If you didn't mind colorful contrasts, you could actually even use it inside out ;)
But it sure was cute...right sides out.. it showed her knickname appliqued on front, plus a nice sized pocket to use:
But, I was on a crazy roll and besides there was fabric left over! So, an ID tag from scraps:
Supplies needed:
scraps of fabric, medium wt. pellon, clear plastic

The tag is simply two rectangles 3 1/2" x 4 1/2" of fabric, one rectangle of pellon for an interfacing and one rectangle of clear plastic.
The plastic layer is cut and sewn shorter than the finished tag for an opening at the tie end in which to slide an id or business card or a simple address label on paper or cardstock. It goes up to about 1/2" from the end of the tag when complete and is simply stitched down on the back of the sewn tag with one long tie looped and sewn down inside the stitched and flipped to the right side tag. The little ties are simply knotted around the bag handle to close. SO much simpler than those complicated luggage or ID tags I've made before!!!


Sewing steps simply shown:


1.Sew tag sections right sides together, pellon on one side, on three sides only. Turn right side out.

2. Make one long tag tie by folding in and in again, ironing flat, stitching down side.

3. Insert long tie in a loop shape. U of the loop is inside the tag. Stitch down the final tag end.
A super easy tag with a fun bag to put the quillow or anything else in!

Quillow: Etymological Note: quilt + pillow
Free Tutorial : Making a Quillow.
and see my first one:
How To Make A Quillow


Free Bag Pattern and ID tag tutorial
NOTE:
Are your sidebar links and photos failing to update for me? Please correct your link list to this setting for With Heart and Hands:
http://www.with-heart-and-hands.com
6 comments:
Absolutely fabulous tutorials!! :D I really like that bag A LOT. I'm bag challenged but I MIGHT have a go at this one. I love bags, have all kinds of bag patterns (of course she does LOL), but I really am 'challenged' when it comes to 'reading' patterns. Love the fabrics that you used. (I would turn it inside out too :D)
Michele, está precioso el bolso. Gracias por el tutorial, un beso
Thanks for that great tutorial! I'll have to add your bag to my queue!
I always make bags for gifts too, no gift is complete with a bag to go with it. Thanks for the tutorial.
what a cute idea. You really are amazing but then I'm just preaching to the choir.. Love ya!
LOVE YOUR IDEA...thank you for sharing and spreading the knowledge to the entire world.
Post a Comment