
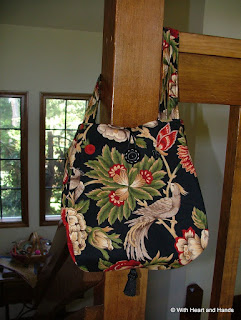
With only one day to spare between packing and leaving for Alaska last month, I couldn't resist making myself a little bag to bring along...I needed something to sew...just for me, and just for fun!
As I discovered later, the entire wedding was done with an Asian theme... in honor of the bride's own lovely heritage. I had used beautiful 'long-marriage' cranes in the Bento'ed Out of My Box wedding quilt as my gift..and to my delight it perfectly matched the folded origami cranes they'd placed on branches on the reception tables and hung in the air above us, among the lovely hanging lanterns.
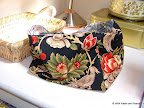
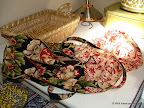
But for my own little purse, I had used some fantastic birds of paradise fabric that I had been gifted. The fabric pattern was called "Indonesia" by April Cornell and while it is several years old, it was brand new to me and lovely to use. The birds of paradise flaunted themselves very nicely on my little homemade and completely 'free' bag and only added to the fun and the flair of the dressing up occasion.
Using a free down-loadable pattern from Lazy Girl Patterns, called the Noriko Handbag, I made a small bag that was both small and portable, and yet fun and different at the same time. Plenty of room for my wedding essentials and any take home momentos.
As I made my little bag, I took photos, so a simple photo tutorial follows to add further description to Joan Hawley's own detailed instructions. I have chosen not to repeat her directions, but to simply label my photos in the order that I sewed the pieces together..being spatially dyslexic, my order is not necessarily the pattern's order, but hey, I tried!
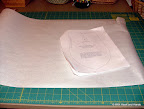
Step 1. For the free down-loadable pattern go to: Lazy Girl | Blog » Free Purse Pattern: Noriko Handbag and simply print it off. I like to have freezer paper patterns as well, so I simply traced the pattern out on my paper.
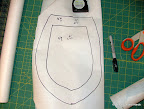
Step 2. Joan's pattern is easy to read and to use, but I needed mine to be slightly larger so I drew out the shape and simply enlarged each piece a bit. The bag's pattern consists of one bag body pattern that is used 4 times for the bag and 4 times for the lining. Two of the panels 'fold in' to create depth and the other 2 for visual impact, so placing focal elements while cutting out your pattern is crucial for impact.

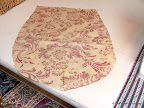
3. All patterns cut out and ready to use!

4. Select and cut out lining fabric, cutting out the pattern four times as each purse ...top cover and the lining, both have four pieced sections.
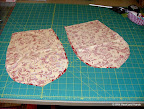
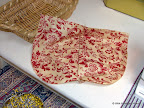
5. Shown above: two sets of lining fabric ready to use.
6. Begin sewing lining section 1 to section 2 ending midpoint.
7. One complete set of lining sections sewn.
8. Two complete sets of lining sections sewn.
8b. Mark a lining section to leave open, no sewn for turning inside out, later.
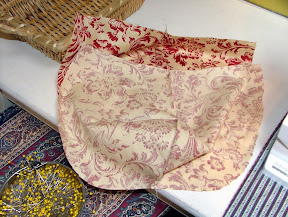
9. Sew lining 1 set to lining 2 set.
10. Sew lining sections together to make a complete unit of the four sections.
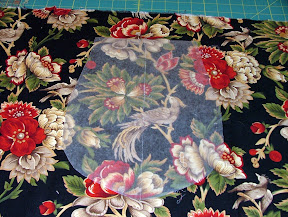
11. Cut out pattern for body (cover fabric) I use wax paper to 'see through' to the fabric and focus the area I wish to center on my pattern. Then cut out a total of 2 sets or 4 pieces of bag body or cover fabric.
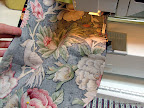
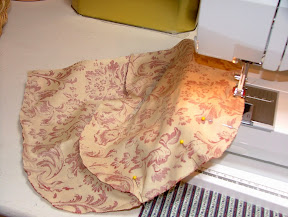
12. Sewing body (2 sections) of bag together.
13. Sewing body (2 more sections) of second set together.
14. Both sets now sewn.

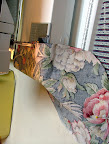
15. Sewing body (cover) of set 1 to body (cover) of set 2.
Body of bag now sewn all together...2 + 2 + the four pieced body.
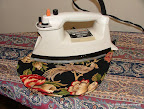
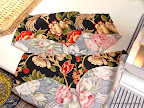
16. Iron body of bag and its correlating lining body completely flat by accordion-ing the 2 'outside' sections into center bag sections, first.
(Here, they are all ironed flat, but I am letting you see the pieces folded in for ironing.)
17. Position straps (note how they magically were sewn and appeared for placement at upper edge of bag, in this photo :) And also insert a small loop of elastic or ribbon to be a button loop, later.
18. Insert right sides together, bag cover body into bag lining sections.
19. Shown above, bag inside bag lining body. Straps pulled inside out of sight, for sewing into the top edge stitching.
20. After I stitched the top edge, I pulled out both sections to show better placement. Note at this point, that an elastic loop also magically appeared at center of bag before I sewed that last seam. Boy, magic is great ;)

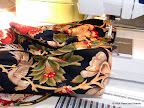
21. Sew a nice row of top-stitching to finish off the edge.
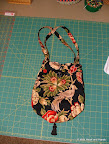
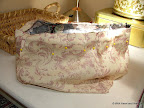
Ta da! A darling but simple little soft body bag, ready to go!
And note how I just added a cute button for the elastic loop to hook onto and a little tassel to the bottom of the bag for added flair! Such fun, and boy..it did hold a lot of leftover cranes, a few bubble wands and several L-O-V-E bookmarks with imbedded seeds to plant later on! And you thought I wanted it to carry a lipstick and car keys!!
5 comments:
It turned out lovely! It's always nice to do something for yourself!
Thanks for the link to the pattern. I can always use a new bag.
I showed this to my daughter and dil, thinking one of them might like it as a gift. They both fell in love with it. Thanks for sharing your tute.
I agree. This is really cute. I appreciate everything you share with us. You've given me lots of really good ideas for gifts.
Michele, it looks gorgeous! I'm making the Noriko bag myself, I found the pattern earlier today. Seeing your pictures makes is easier, as I am a beginner with the sewing machine.
Thank you so much.
Post a Comment