

Ones that I have seen are usually either paper pieced, such as the style used in waves and circular patterns, seen on the cover of a popular book (which I don't own) or they use rotary cutters and same size blocks to then create more random pieces as in popular liberated quilting books.
I wanted a truly random, free-pieced technique that was neither sketched out, nor paper pieced, and only used scissors for cutting super random pieces of fabric from my scrap bags. And since I couldn't find anything online where I saw someone doing this,everyone is paper piecing and I wanted true liberation ;) So, I did it myself and took some random photos of that process!
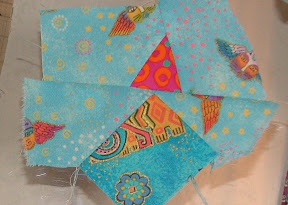
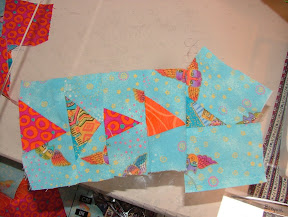
As you can see, no pre-cuts, no rulers, no mat, no rotary cutter...just some fairly raggedy strips and pieces and truly random piecing..but it worked and it was great fun! I'm sure when I'm working with a bigger sized piece I will have more 'in flight motion' but for now, I was happy with a little random line across the top of my little art quilt.
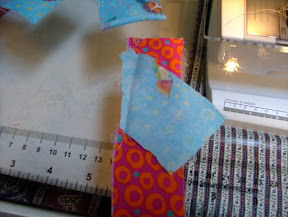
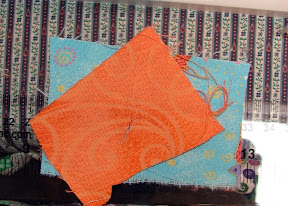
Step 1. Grab strips and pieces of fabric, and sew your first seam. I would sew and cut as I went along my pieces...always just using scissors as I sat at the machine.

Step 2: Flatten out first "sky" section, prepare center section for sewing on the second one.
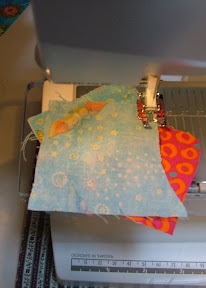
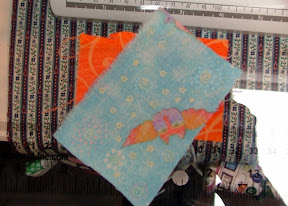
Step 3: Grabbing a random bit, sew it on at an angle on the other side of the center section. Remember nothing has to, nor should it be, straight or perfect!

Step 3: Flatten out this other 'sky' section and get ready for the next goose!
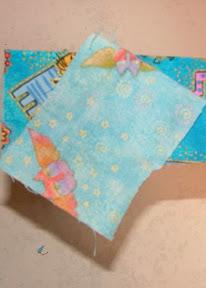
Step 4: Switching colors now...so a sky color on top of a different colored scrap of goose!
Step 5: Sew the first goose to the second goose...finally, we have flying geese!


Step 7: Keep on making geese and seaming them to the previous one!


Step 8: You can cut straight across if this new raw edge bothers you but you don't have to. Just keep making geese and sewing them together to the flying chain if you want to!

Step 9: Three geese looking for a nice gander!
Step 10: Here he comes...how about an orange one. Notice how he's a scrappy little fellow, a bit raggedy but he joins in just fine!

Step 11: There he is..a fine feathered fellow!
Step 11: Keep going, in fact, it looks like he jumped ahead of the line now and is leading the flock!
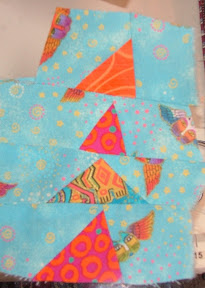
Step 12: But another one got added to the lead position and now we're really off and flying!
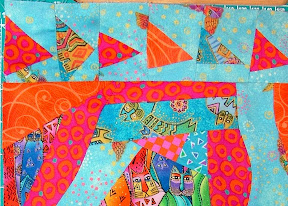
Ahh, there they all are...a whole gaggle of flying and completely liberated flying geese! And don't they look good with liberated pieced curving strips and other random piecing of my little art quilt? They truly are great fun!
Oh dear, looks like a cat is near by...and I think he sees those geese ;)
Gaggle of geese...pedal to the metal! You're heading for the AAQI Liberated Challenge!
Liberated Quilting: Free Patterns, Blocks, Ideas&Tutorials
Links to my Liberated Flying Geese in this tutorial plus regular, 3D and other more traditional flying geese:
Liberated Free-Pieced Flying Geese
Flying Geese Tutorial3D Flying Geese Tutorial
Flying Geese Tutorial using a ruler technique
Color Wheel Flying Geese..paper pieced, in a circle[PDF]One Seam Flying Geese Tutorial
12 comments:
I love your liberated flying geese. I can't wait to try this. You're my kinda gal!
You always have so much fun, and get so much done. Maybe I need to stop trying to be perfect and be liberated myself!
Oh Michele. Yet another fantastic tutorial. Love them!
Thanks, another awesome tutorial.
OK! go for it!! I've got to try this.
Oh my god, this is so totally cool. I think even I might be able to try this. Seriously.
Love them! The colors are so bright and cheerful and the flying geese look like they're having fun!
That's cool. Thanks for the tutorial!
you've made it look quite do-able. thank you for the step by step info.
the little quilt looks so bright and happy spirited~!
good for you.
:-)
libbyQ
Love it! Everything you do is so amazing! I really don't know how you figure things out like this!
Great tutorial, and this looks like so much fun! I love my rotary cutter, but it's also great fun to just pick up the scissors and play. Thanks for the kick in the pants!
What fun geese you have created Michele- I love your liberated things- they make me smile - especially the ones that are close to that lovely Laurel Burch cat fabric. She was such a talented lady. I love her fabrics.
Thanks for sharing your talents too.
Regards,
Anna
Post a Comment