

As part of a online quilters' challenge (inspired by our mutual admiration society for Mary Lou Weidman) I have created a simple tutorial on designing your own liberated, wonky, modern...or for Mary Lou Weidman.
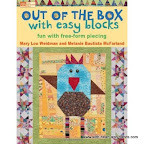
I was honored when she asked me to review her "Out of the Box" book as part of a giveaway. It was a lot of fun to review and even more fun to own the book, myself, and give one away.
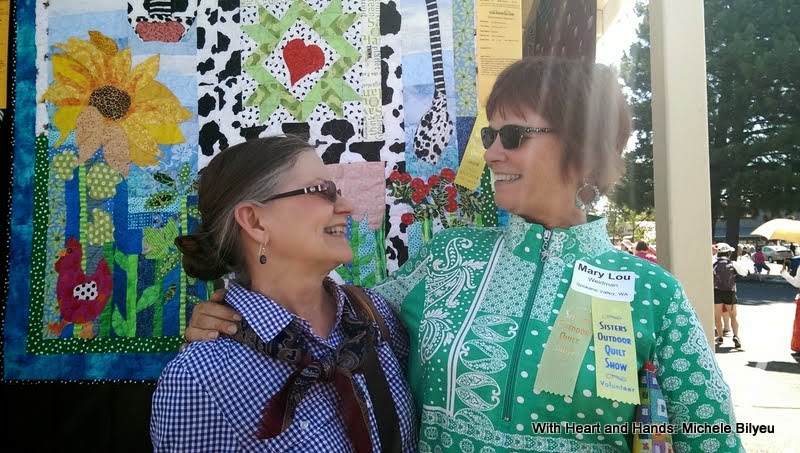
I had several of her previous books (which I loved) but never met her in person. Then shortly after my review and a wonderfully fun drawing for a copy of it for my readers, I had the opportunity to meet her at the last 2014 Sisters Outdoor Quilt Show.
I had several of her previous books (which I loved) but never met her in person. Then shortly after my review and a wonderfully fun drawing for a copy of it for my readers, I had the opportunity to meet her at the last 2014 Sisters Outdoor Quilt Show.


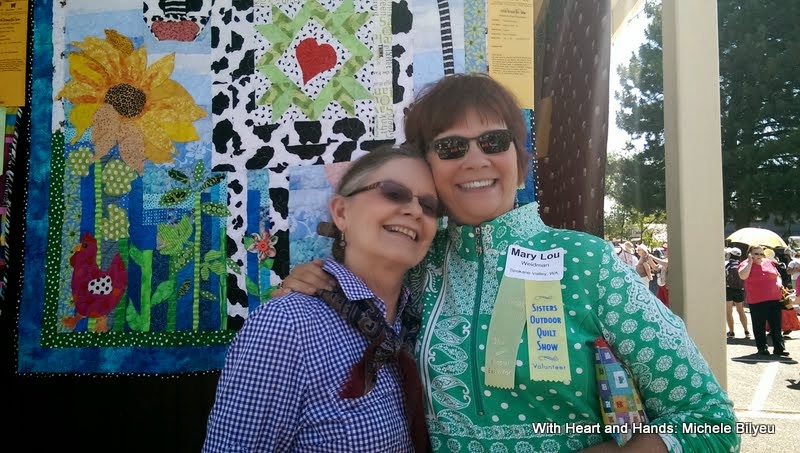
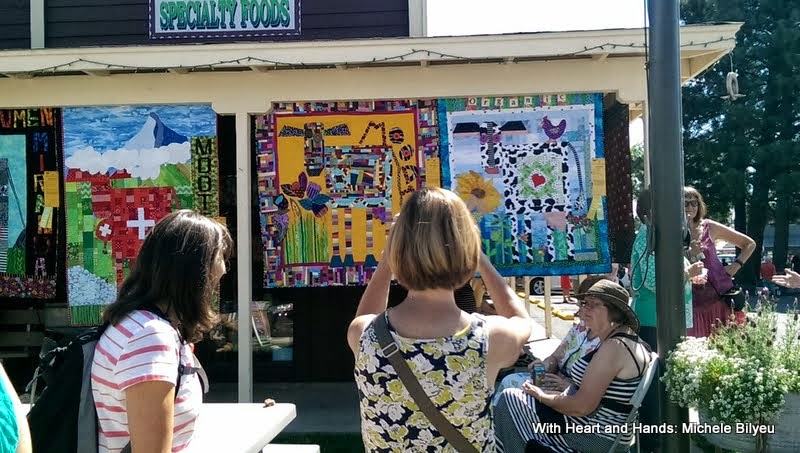
Mary Lou has been having a terrific response to her book and especially to her and her fans 'cows'. As part of the 2014 Sisters Outdoor Quilt Show, she was showing her famous "Cow Quilts" along with her col-writer Mel (Melanie Bautista McFarland)
And now, we all have been supporting Mary in online quilting groups after her very recent diagnosis of breast cancer. She expressed interest in 'Cross Quilts' especially the artsy, wonky ones and asked if any of us knew how they were made as she could see it involved simple slashing here and there.
I quickly drew her a super simple basic block pattern and it has led to my offering to post the rest of that process here. And you'll notice my dyslexia showing in the drawing above. That solid cross bar is supposed to be horizontal! Make you wonder how in the world I do all of the things that I do, doesn't it? Yep. Me too.
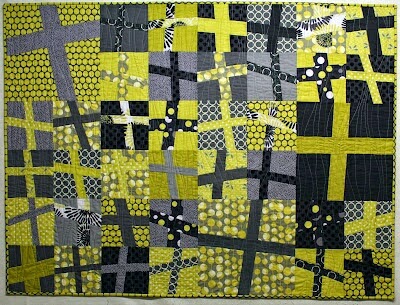
Now, being an artist, Mary Lou loves the look of the super artsy, out of the box, and over the top art quilts she found online.
But I know, when we're dealing with a variety of styles and abilities of quilters who may not be into wonky, much less super duper artsy, we are more likely to achieve a great effect with one more like this one.
Because our blocks will be individualized and wonky, with varying sized crosses, no sizing can work for all. So, about the size of a piece of paper to start your block or a 12" block and turn it into a rectangle after the fact. Seriously.
Our hope is that quilters may volunteer to make Mary Lou a Liberated Cross Block or two in her favorite bright colors of red (shades of red to create the background), cheddar, lime green and purple. And then throw in some pinks, and lavenders,and some pale and gentling neutrals so we can get variety and value and all the rest of that good stuff.
So, I am providing the start over impetus, here! Let's see if we can do this!! I have some quilters who are raring to go, but we need a lot more. Do we want a little lap quilt to just cover her up enough to read a magazine on top of, or do we want a nice big quilt hug that covers her up with love? Either way, we'll all fill it with our very best and most positive thoughts, well wishes, and lots and lots of healing energies and prayers galore!
And just so you other quilters, know. I have the tiniest little stash compared to most of you and I only found a very few pieces that would work, so my beginner's quilt is paper ;-) And best of all, if I made a mistake, I could easily start over....let's see..which way is up????
Designing a Liberated Cross Block
But wonky quilters don't think like other quilters might. So, the progression is different, too. Basically, it is slash and sew as you go.
Cut and Sew in Quick Steps:
The Easy, Liberated Cut and Sew as You Go Method
Slash your background ) block vertically.
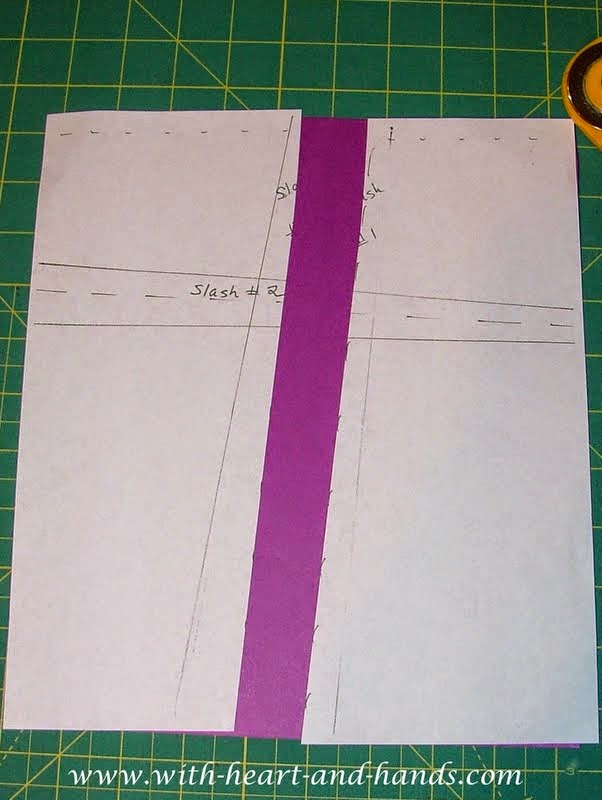
Insert your coordinating fabric and sewn it in on both sides.
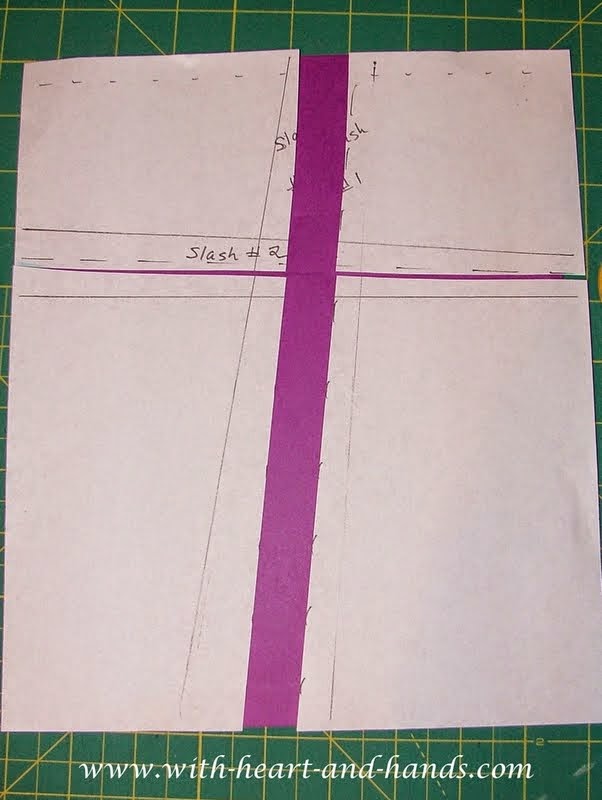
Slash this unit, horizontally.

Insert your coordinating fabric and sew in horizontally.
Now, our already liberated and wonky quilters, don't think about it, they just do it. And trying to figure out what I think as I do has been a circuitous process. I only got 1 hour and 45 minutes the night before and had no brain much less logic. No sleep and no naps makes for one wonky life!
But having a lot of traditional quilter friends who need specific and logically progressing patterns. I'm trying to supply that for all of you! So, if you are rational and logical..yes, I mean you and you know who you are...
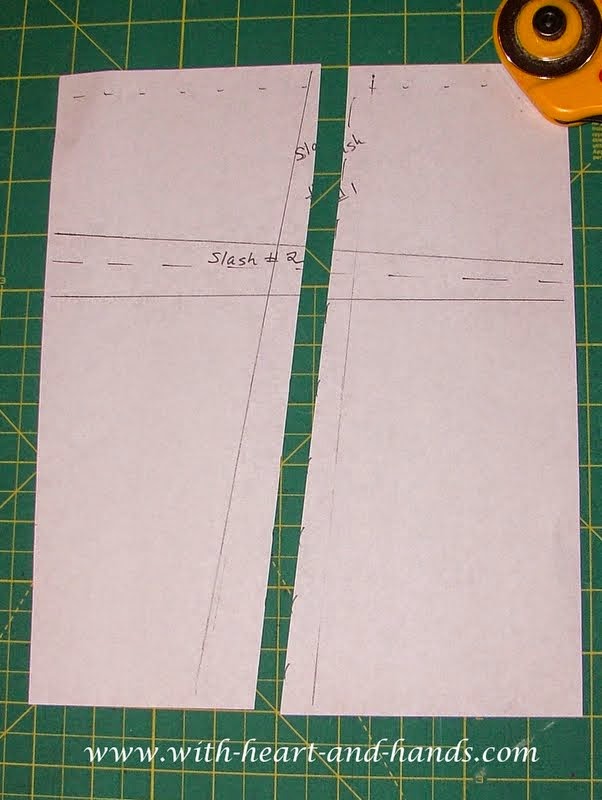
The progression is Draw, Cut, and Sew!
1. Draw a cross bar..in any horizontally slanted direction or position of your choice.
2. Draw a connecting, but not crossing over, vertical bar to intersect it on both side of its middle.
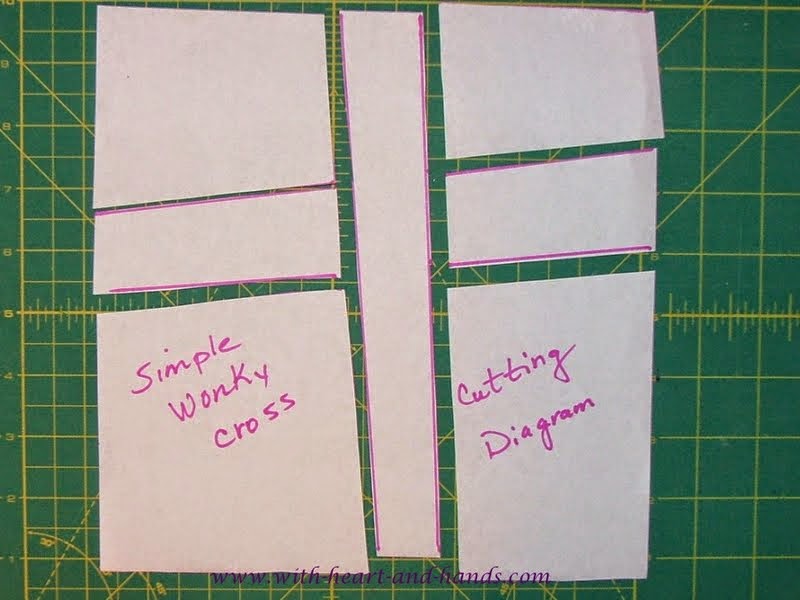
Cut and Sew in More Traditional Steps!
Version 2.To cut out your "pattern"(if you need one) in more the traditional way to create your block:
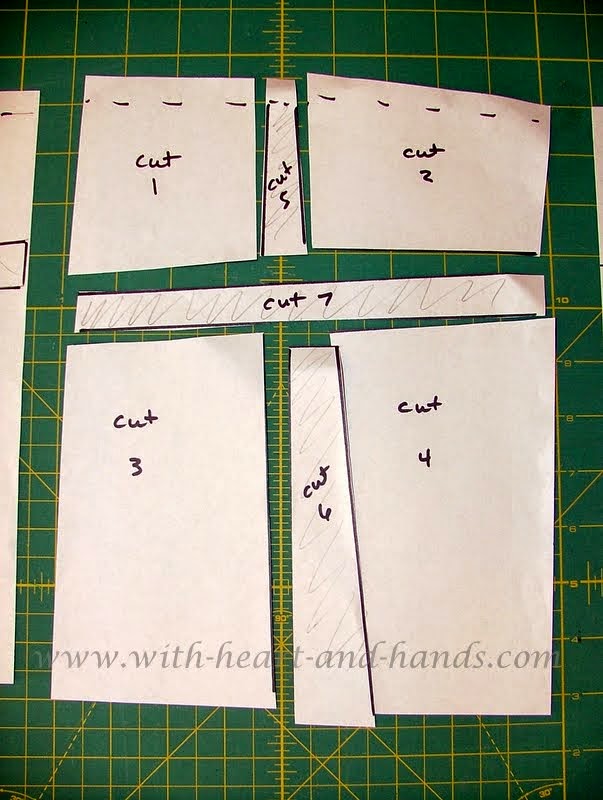
1.Cut out the sections, one by one. I have numbered mine in order to create a patterning style as this is how I work with my own spatial and dyslexic brain in order to process anything involving 'math' or 'directions' of any kind.
To sew your 'pattern' pieces together:
1. Sew your pieces together, one piece to another, I used the same clockwise progression, and then added in the horizontal cross bar last...which then anchors the middle and completes the block.
And there you go, you now have a Liberated Cross Block!
And just for fun, I then created a variety of other variations of the liberated cross block idea..to show how it might all play out! Just for seeing the flow!
To create and donate a block or two:
Design your own version, using basic directions or winging it your way. Starting with a 12" block or something around the size of a piece of paper. Yes, seriously.
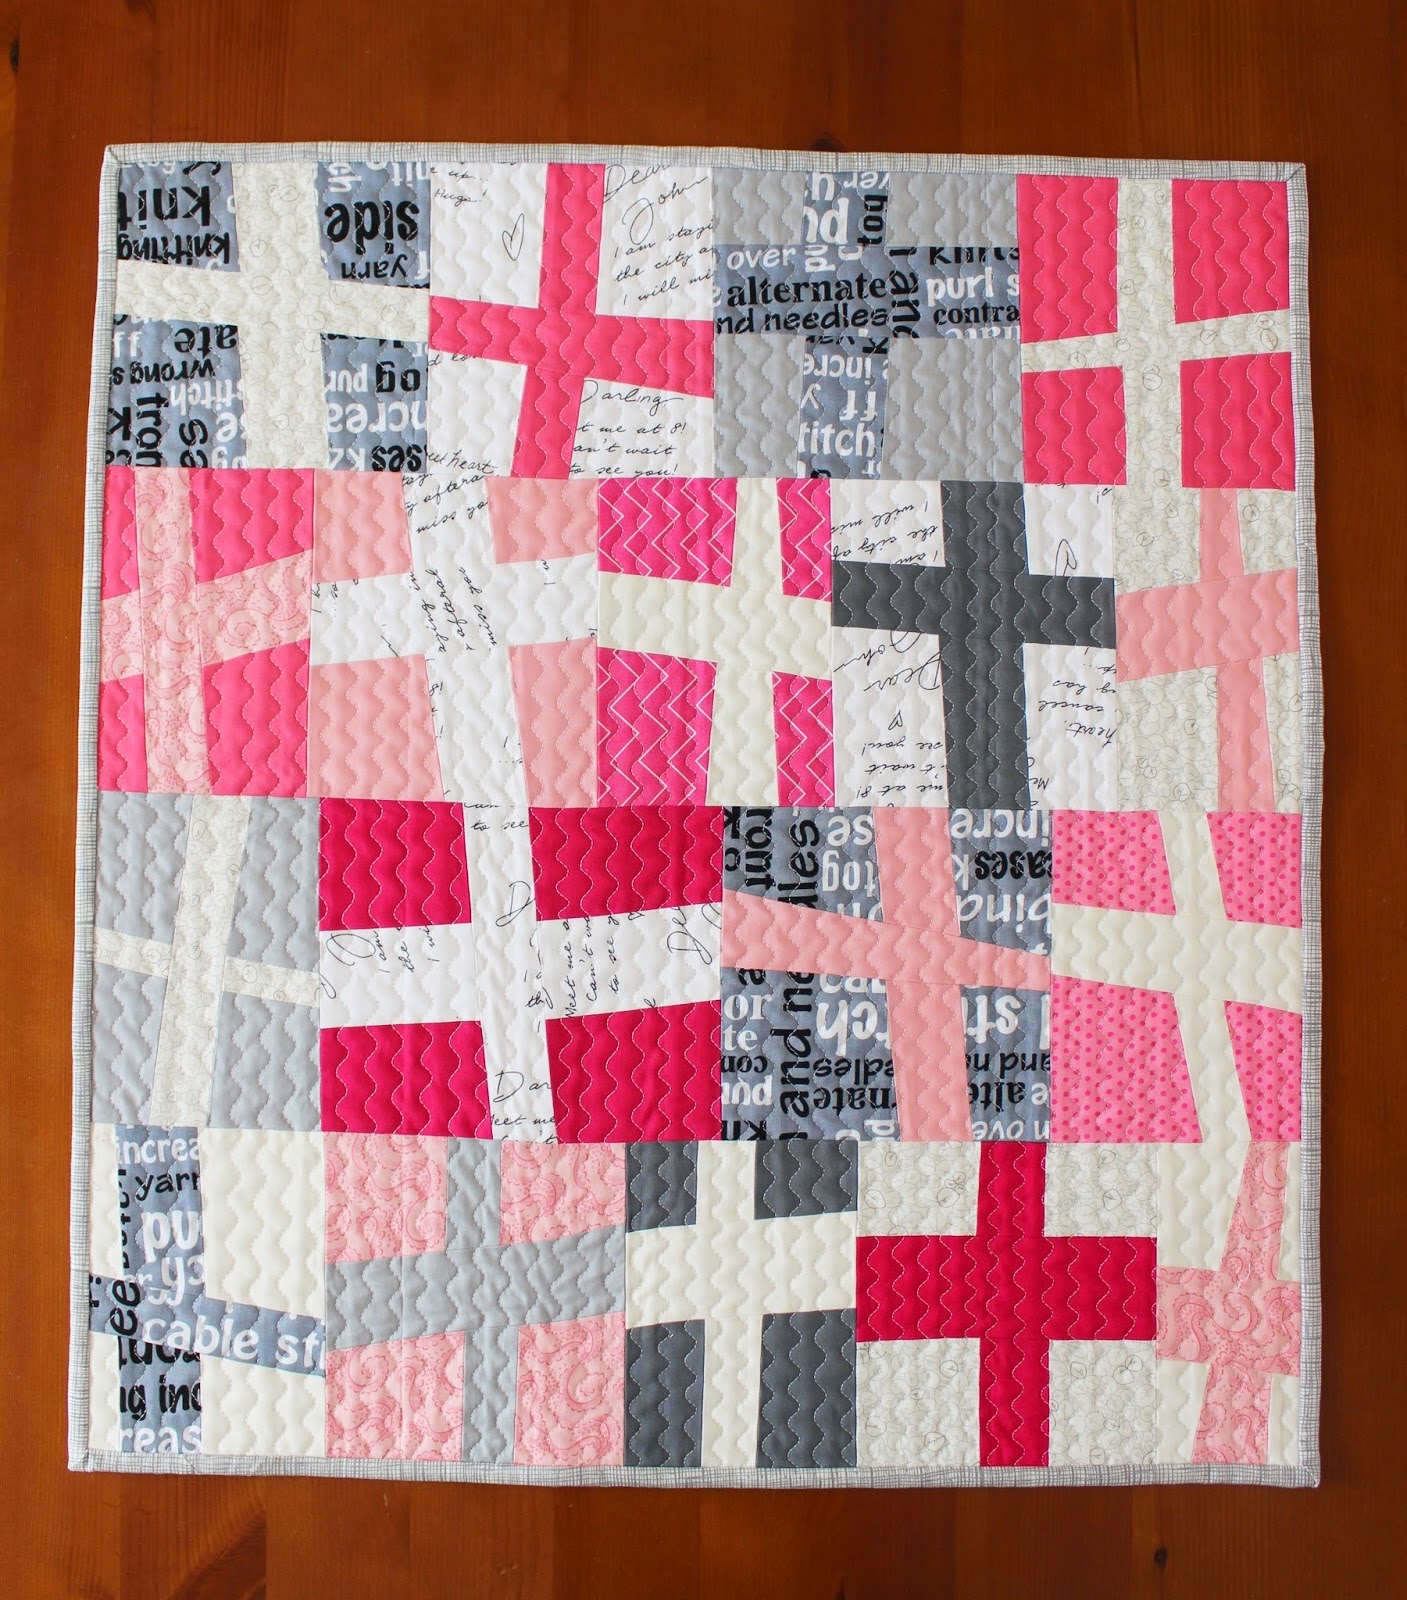
Block backgrounds should be any color of red, subdued patterning or solids, with cross in colors in cheddar, lime, purple, lavender, pinks, shades of blue, neutrals for variety as shown in the example I found that Mary also loves, below.
Mail Blocks
Michele Bilyeu
removed (no longer applicable!)
All blocks will be fit in and used somehow!
Do not sign your block.
This is for comfort and love not as a signature quilt of who had time and those who didn't.
We all send love and prayers and caring in so many ways.
Yes, I absolutely appreciate donations of additional fabrics for finishing up the top and making our motley crew of hodge podge happy friends. The blocks will come in as every size one can think of, anyway ;-)
Ask me how I know.
Yes, do send extra fabric to add in to the sides etc of your blocks or just to send to help out.
I have a very limited stash and appreciate donations of any kind.
Thank you all so much for you interest and support! It means a lot!!!
Need a wonky and liberated Cross Quilt Pattern?
Kona Crossing
Here's a few more ideas to get your creative mojo flowing:


Quilt has been finished: Block Donation Info below, no longer applicable!
To create and donate a block or two:
Design your own version, using basic directions or winging it your way. Starting with a 12" block or something around the size of a piece of paper. Yes, seriously.
Block backgrounds should be any color of red, subdued patterning or solids, with cross in colors in cheddar, lime, purple, lavender, pinks, shades of blue, neutrals for variety as shown in the example I found that Mary also loves, below.
Mail Blocks
Michele Bilyeu
removed (no longer applicable!)
All blocks will be fit in and used somehow!
Do not sign your block.
This is for comfort and love not as a signature quilt of who had time and those who didn't.
We all send love and prayers and caring in so many ways.
Yes, I absolutely appreciate donations of additional fabrics for finishing up the top and making our motley crew of hodge podge happy friends. The blocks will come in as every size one can think of, anyway ;-)
Ask me how I know.
Yes, do send extra fabric to add in to the sides etc of your blocks or just to send to help out.
I have a very limited stash and appreciate donations of any kind.
Thank you all so much for you interest and support! It means a lot!!!
Need a wonky and liberated Cross Quilt Pattern?
Kona Crossing
My Links for the making of my cross quilt:
Cross or Plus Quilts: Free Patterns
Designing a Liberated Cross Block and Quilt
Making Mary Lou Weidman's Cross Quilt
finished and mailed to Mary Lou April 7, 2015
Michele Bilyeu blogs With Heart and Hands as she shares a quilting journey from Alaska to Oregon with thousands of free Quilting, Sewing, and Crafting Patterns and Tutorials. Help change the world, one little quilt, art quilt, and prayer flag at a time!
12 comments:
Congrats for stepping up to the challenge - where shall we mail our rectangular blocks? To Mary Lou?
Is there a particular size (other than rectangular) to make the blocks? I'd love to contribute one or two to Mary Lou.
Where do the blocks for Mary Lou get mailed to? Thanks so much for the tutorial!
Updates on Facebook after a lets see what we are getting response, first!
I'm game! Is the 8.5X10.5 the finished block or 8X10? I can make blocks now and send them when you release an address? Just let me know.
Unfinished size. Blog post is constantly being edited with updates, corrections and to answer questions. With four interconnected but out of sequence on facebook, it's become a challenge making things as clear as I'd hoped to be. Sorry.
Hi Michele,
At the end of the post you also have the block size as 8" x 11" finished.
A quarter of a 8" x 10" would be four 4" x 5" blocks finished.
Thanks for doing this for Mary Lou.
I will send a block. You can do a closed FB group- Cross for Mary Lou or some other title and have a perm file on there for address/questions etc. It is very easy. and people can join it and stuff shared on there is not visible on the person's timeline except to other group members. I can't be doing blogs that come in email- It is too much. Please put on FB somehow. Thanks- Tho this thing makes me put google send to reenainchina@yahoo- I never check the gmail.
This sounds like fun! I will make a block this week and send it to you (oh, I'll need your address, you can email me at scrapquitler@gmail.com )
Please count me in, too. I can send extra fabric, too. Would you please send me the address you'd like the blocks mailed to? Thank you for doing this for Mary Lou. She is amazing!
Saw the post on Facebook and am passing the link to this page on to my local quilt group. Hopefully that will generate some more blocks and fabrics for you!
This is a really good read for me. Must agree that you are one of the best bloggers I ever saw. Thanks for posting this informative article.
Post a Comment